

Ultimate Brown Butter Rice Krispies Treats Recipe
These are the Rice Krispies treats that ruin all other Rice Krispies treats. One bite in and suddenly the regular version feels emotionally unfinished. Brown butter really walks in here acting like it owns the place. Honestly, fair enough.
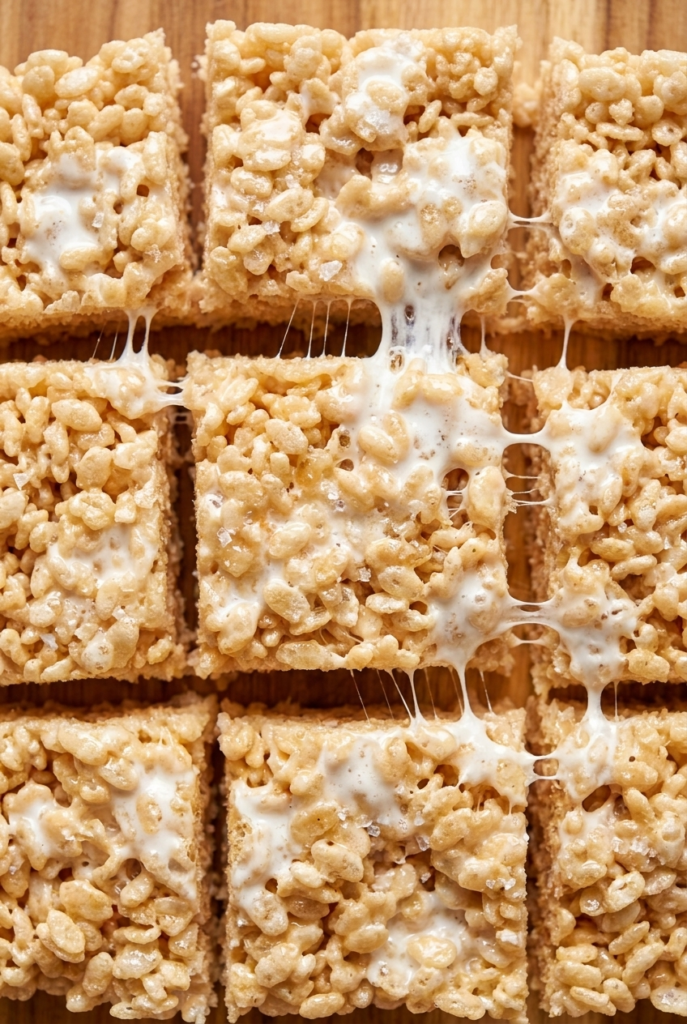
The texture is outrageously good too. Soft, stretchy marshmallow pockets, crispy cereal, buttery caramel notes, tiny flakes of sea salt on top. It somehow tastes nostalgic and bakery-level at the same time. Dangerous combination for anyone standing too close to the pan with “just one little square” energy.

❤️ Why You’ll Love This Recipe
- Gourmet Flavor Upgrade – Browning the butter adds an incredible depth and nuttiness that elevates these treats from basic to brilliant.
- Extra Gooey Texture – We use a secret ratio of melted and whole mini marshmallows to create the perfect chewy, gooey bite every single time.
- Ready in 20 Minutes – This no-bake recipe is ridiculously fast, making it the perfect last-minute dessert for any occasion.
- 5 Simple Ingredients – You only need a handful of pantry staples to create this show-stopping sweet treat.
🛠 Tools You’ll Need
- Large saucepan or Dutch oven 냄비
- Rubber spatula 🥣
- 9×9-inch baking pan ⏹️
- Parchment paper 📜
🥄 Key Ingredients
For the Ultimate Treats:
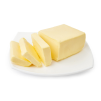
- Unsalted Butter (½ cup) – The star of the show! We’ll brown it to create a rich, nutty, and complex flavor base. Using unsalted gives you full control over the saltiness. 🧈
- Mini Marshmallows (8 cups) – The key to our gooey texture! We melt most of them and stir the rest in at the end for delightful pockets of whole marshmallow. ☁️
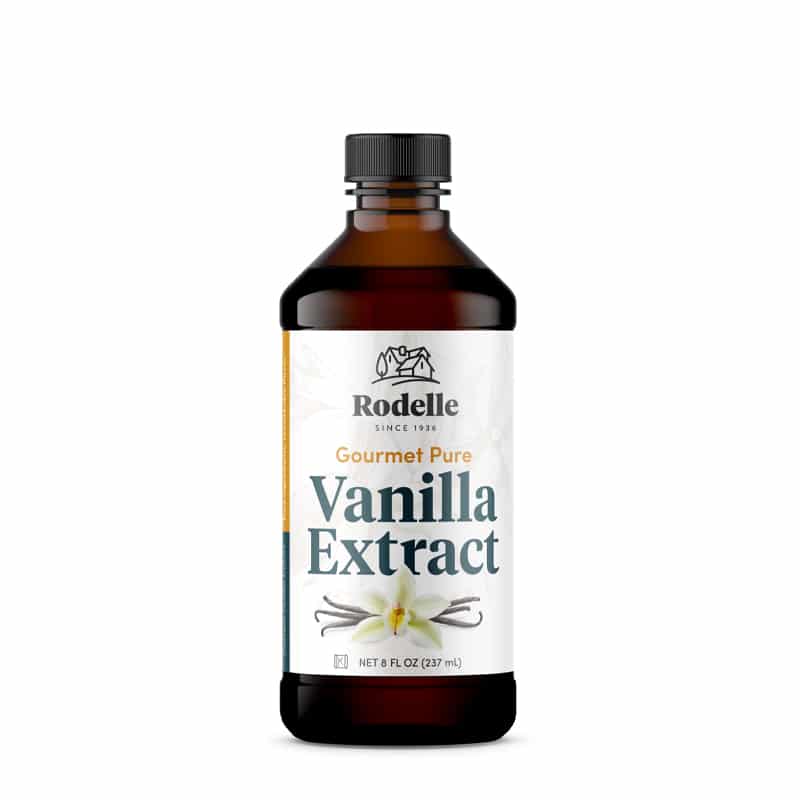
- Vanilla Extract (2 tsp) – A splash of good quality vanilla enhances the warm, caramelized notes of the brown butter.
- Rice Krispies Cereal (7 cups) – The classic crispy, crunchy backbone of our treats. Accept no substitutes! 🌾
- Flaky Sea Salt (½ tsp) – This is non-negotiable! A sprinkle on top balances the sweetness and makes all the other flavors pop. ✨
🍳 How to Make Brown Butter Rice Krispies Treats
- Prep Your Pan: Line a 9×9-inch baking pan with parchment paper, leaving an overhang on the sides to act as handles. This makes removal a breeze! Set it aside. 📝
- Brown the Butter to Perfection: In a large pot over medium-low heat, melt the butter. Continue cooking, stirring occasionally, as it foams, bubbles, and eventually, little golden-brown specks appear at the bottom. It will smell incredibly nutty and amazing – watch it closely so it doesn’t burn! 🔥
- Melt the Marshmallows: Once the butter is beautifully browned, turn the heat down to low. Add 6 cups of the mini marshmallows to the pot. Stir continuously until they are completely melted into a smooth, gooey mixture.
- Flavor Boost: Remove the pot from the heat immediately. Stir in the vanilla extract. The mixture might sizzle a bit, which is totally normal.
- Combine Everything: Add the Rice Krispies cereal and the remaining 2 cups of mini marshmallows to the pot. Stir gently with a spatula until the cereal is just coated. Be careful not to overmix, as this keeps the treats light and airy. 🥣
- Press Gently: Scrape the mixture into your prepared pan. Lightly grease your spatula (or your fingertips) with butter or nonstick spray and gently press the mixture into an even layer. Don’t compact it too much, or your treats will be dense and hard!
- Final Flourish: Sprinkle the flaky sea salt evenly over the top. This is the magic touch! ✨
- Cool and Cut: Let the treats cool completely at room temperature for at least 1 hour to set up. Once firm, use the parchment paper handles to lift them out of the pan. Cut into 9 generous squares and enjoy! 🎉
💡 Tips for Success
- Fresh Marshmallows are Key – Always use a fresh bag of marshmallows. Stale marshmallows don’t melt as well and can result in a dry, crumbly treat.
- Low and Slow Heat – Patience is everything when browning butter and melting marshmallows. Low heat prevents scorching and ensures a perfect, gooey result.
- The Gentle Press – The biggest mistake people make is pressing the mixture too firmly into the pan. A light, gentle touch is all you need for soft, chewy treats.
- Don’t Walk Away! – Brown butter can go from perfectly nutty to burnt and bitter in a matter of seconds. Keep a close eye on it throughout the process.
🆘 Troubleshooting Guide
- Problem: My treats are hard and brittle.
Likely Cause: The marshmallow mixture was cooked for too long or at too high a temperature, turning it into candy. Alternatively, you pressed the mixture too firmly into the pan.
Solution: Melt marshmallows on low heat and remove them as soon as they are smooth. When pressing into the pan, use a very light touch – just enough to even out the top. - Problem: My brown butter tastes burnt or bitter.
Likely Cause: The butter was cooked past the browning stage and the milk solids burned.
Solution: Unfortunately, there’s no saving burnt butter. You’ll have to start over. Next time, watch for the nutty aroma and golden-brown specks, and pull it from the heat immediately. - Problem: My treats are soggy.
Likely Cause: The ratio of cereal to marshmallow was off, with too much marshmallow mixture.
Solution: Double-check your measurements! Ensure you’re using the correct amount of cereal to absorb the gooey marshmallow goodness.
👩🍳 Pro Chef Tips
- Level-Up Your Vanilla: For an even richer flavor, scrape the seeds from half a vanilla bean or use 1 teaspoon of vanilla bean paste instead of extract.
- Creative Mix-Ins: After stirring in the cereal, gently fold in about ½ cup of mini chocolate chips, toffee bits, or chopped toasted pecans for extra texture and flavor.
- Pan Size Matters: This recipe makes thick, bakery-style treats in a 9×9 pan. For thinner, more traditional treats, press the mixture into a 9×13-inch pan.
☕ Perfect Pairings
- A steaming mug of hot coffee ☕
- A tall, cold glass of milk 🥛
- A rich and decadent hot chocolate 🍫
- A scoop of creamy vanilla bean ice cream 🍨
📦 How to Store
- At Room Temperature: Store the treats in an airtight container at room temperature. They are best enjoyed within 2-3 days for maximum freshness and chewiness, but will last up to 4 days. Do not refrigerate, as it will make them hard.

Get Recipes on Pinterest
📌 More Recipes You’ll Love
- 🎀 Soft Sour Cream Cookies with Pink Frosting
- 🍪 Ultra-Soft Cinnamon Cream Cheese Cookies
- 💚 Grinch Snowball Cookies – Buttery, Green & Full of Holiday Cheer!
- 🍋 Ooey Gooey Butter Cookies – The Softest Cookie You’ll Ever Taste
Brown Butter Rice Krispies
Description
Prepare to rediscover a beloved classic with our Brown Butter Rice Krispies Treats. This recipe takes the humble cereal treat and elevates it to a truly unforgettable dessert experience. The magic lies in one simple yet transformative step: browning the butter. This technique coaxes out deep, nutty, and toasty caramel notes from the butter, creating a flavor foundation that is complex, aromatic, and utterly addictive. Forget everything you thought you knew about Rice Krispies treats; this version is in a league of its own.
Ingredients

Instructions
-
Line a 9x9-inch baking pan with parchment paper, leaving a little overhang on the sides for easy lifting later.
-
Place the butter in a large saucepan or Dutch oven over medium-low heat. Let it melt completely, then continue cooking while stirring occasionally.
-
The butter will foam, bubble, and eventually develop golden-brown specks at the bottom of the pan. Once it smells deeply nutty and toasted, remove it from the heat immediately before it burns. Tiny timing window. Keeps people humble.
-
Reduce the heat to low and add 6 cups of the mini marshmallows to the browned butter. Stir continuously until completely melted and smooth.
-
Remove the pot from the heat and stir in the vanilla extract until fully combined.
-
Add the Rice Krispies cereal and the remaining 2 cups of mini marshmallows to the pot. Gently fold everything together until the cereal is evenly coated.
-
Do not aggressively stir or crush the mixture. That’s how you end up with dense little cereal bricks instead of soft chewy treats.
-
Scoop the mixture into the prepared baking pan. Lightly grease a spatula or your hands and gently press the mixture into an even layer.
-
Press lightly. Very lightly. Rice Krispies treats remember violence.
-
Sprinkle the flaky sea salt evenly across the top while the treats are still slightly warm.
-
Let the treats cool completely at room temperature for about 1 hour until set.
-
Lift the treats out of the pan using the parchment paper handles. Cut into large squares and serve.