

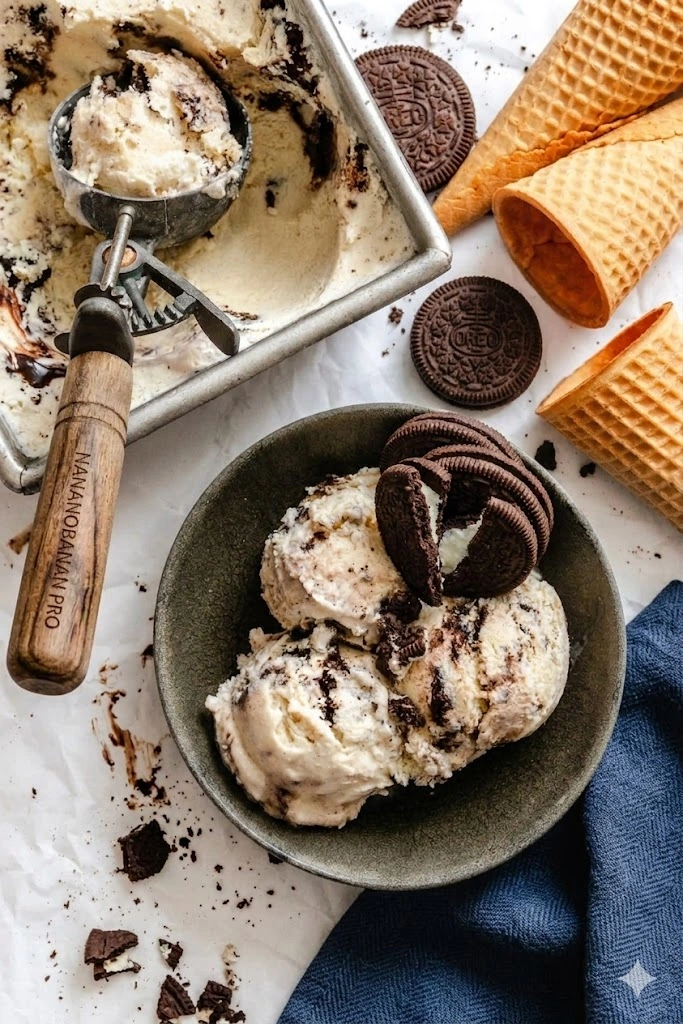
Easy No-Churn Cookies and Cream Ice Cream
This ice cream has a very specific effect on people. Someone opens the freezer “just to check if it’s ready” and suddenly half the container has mysteriously vanished. The cookies were never safe. Neither was your self-control honestly.
The texture is rich and creamy with little crunchy cookie pieces tucked into every bite. Some crumbs melt slightly into the vanilla base and turn the whole thing into that classic cookies-and-cream flavor everybody somehow turns feral for at midnight with a spoon directly out of the loaf pan.
❤️ Why You’ll Love This Recipe
- No Machine Needed – Forget bulky, expensive ice cream makers! This recipe uses a clever manual churning technique to achieve a silky-smooth texture.
- Incredibly Easy – With just 6 basic ingredients and a simple whisk-and-freeze method, this is the perfect recipe for beginners and pros alike.
- Classic Flavor Perfection – We’re talking rich vanilla-kissed cream loaded with crunchy chocolate sandwich cookie chunks in every single bite. It’s nostalgia in a scoop!
- Customizable Fun – Easily swap the cookies or add mix-ins to create your own signature ice cream flavor.
🛠 Tools You’ll Need
- Medium Mixing Bowl 🥣
- Whisk ✨
- Freezer-Safe Container (a 9×5 inch loaf pan is perfect!) 🧊
- Plastic Wrap or Airtight Lid
- Handheld Electric Mixer or Immersion Blender (optional, but helpful!)
🥄 Key Ingredients
For the Ice Cream Base:
- Heavy Whipping Cream (2 cups) – This is the star of the show! Its high fat content is essential for creating that ultra-rich, creamy, and luxurious texture. Don’t substitute this! 🍦
- Whole Milk (1 cup) – Adds moisture and balances the richness of the cream, contributing to a perfect scoopable consistency. 🥛
- Granulated Sugar (3/4 cup) – Provides sweetness and, importantly, lowers the freezing point of the mixture, preventing it from turning into a solid block of ice. 🍬
- Pure Vanilla Extract (2 tsp) – Elevates the flavor from simple sweet cream to a classic, aromatic vanilla base that complements the chocolate cookies perfectly. ✨
- Salt (A pinch) – A tiny pinch of salt makes all the sweet flavors pop! It’s a secret weapon for balancing sweetness. 🤏
- Chocolate Sandwich Cookies (1 cup, chopped) – The iconic crunch and flavor! Use your favorite brand (like Oreos) and chop them into a mix of coarse chunks and fine crumbs for the best texture. 🍪
🍳 How to Make No-Churn Cookies and Cream Ice Cream
- Create the Sweet Cream Base: In a medium bowl, whisk together the whole milk, granulated sugar, and salt. Keep whisking until you can no longer feel the gritty sugar granules—this ensures a smooth final texture. Stir in the heavy cream and vanilla extract until everything is just combined. 🥄
- Initial Chill & Freeze: Cover the bowl and chill the cream mixture in the refrigerator for at least 1 hour. This is crucial for helping it freeze evenly. Once chilled, pour the mixture into your freezer-safe container (like a loaf pan) and cover it with plastic wrap. Pop it into the freezer for 45 minutes. 🥶
- The First ‘Churn’: After 45 minutes, you’ll see the edges starting to freeze. Take it out and mix it vigorously with a whisk, a handheld electric mixer on low speed, or an immersion blender. Your goal is to break up any large ice crystals that have formed. 🌪️
- Fold in the Cookies: Now for the best part! Gently stir in your chopped chocolate sandwich cookies. You want to distribute them evenly throughout the semi-frozen base. 🍪
- Final Freeze & ‘Churn’: Place the container back in the freezer. For the next 2-3 hours, take it out every 30 minutes and give it another vigorous stir. This repeated process is what makes the ice cream creamy and scoopable without a machine. Once it’s frozen through and has a firm, scoopable texture, it’s ready! 🍨
💡 Tips for Success
- Pre-Chill Everything – For the creamiest results, pre-chill your mixing bowl and loaf pan in the freezer for 15-20 minutes before you start. A cold environment helps the ice cream freeze faster and form smaller ice crystals.
- Don’t Skimp on Fat – Use whole milk and heavy whipping cream. The fat content is critical for a smooth, non-icy texture in homemade ice cream.
- Chunk Size Matters – For the best texture, chop your cookies into a variety of sizes, from fine crumbs that flavor the base to larger chunks that provide a satisfying crunch.
- Vigorous Mixing is Key – When you stir the ice cream every 30 minutes, don’t be shy! A vigorous whisking or mixing incorporates air and breaks down ice crystals, which is the secret to a creamy no-churn texture.
🆘 Troubleshooting Guide
- Problem: My ice cream is icy or grainy.
Likely Cause: Large ice crystals formed due to insufficient mixing or a freezer that isn’t cold enough.
Solution: Ensure you are mixing vigorously every 30 minutes during the freezing process. Also, check that your freezer is set to 0°F (-18°C) or colder. - Problem: The ice cream is too hard to scoop.
Likely Cause: It has been in the freezer for a long time or has too little sugar.
Solution: Let the container sit on the counter for 5-10 minutes to soften slightly before scooping. Ensure you used the correct amount of sugar, as it helps keep the ice cream soft. - Problem: My cookies got completely soggy.
Likely Cause: The cookies were chopped too finely or added too early in the process.
Solution: Use larger cookie chunks and fold them in gently after the first 45-minute freeze. Some crumbs will flavor the base, but larger pieces will stay crunchier.
👩🍳 Pro Chef Tips
- Flavor Infusion: For a deeper vanilla flavor, use a vanilla bean pod. Scrape the seeds into the milk and sugar mixture, and let the pod infuse in the cream base during the 1-hour chilling step (remove it before freezing).
- Add a Swirl: After folding in the cookies, create a beautiful swirl by drizzling a thick hot fudge or caramel sauce over the top and gently running a knife through it just once or twice before the final freeze.
- A Boozy Boost: A tablespoon of a neutral spirit like vodka or a complementary liqueur like crème de cacao can help keep the ice cream softer and more scoopable, as alcohol doesn’t freeze solid.
☕ Perfect Pairings
- A warm, fudgy brownie on the bottom 🍫
- A drizzle of rich, homemade hot fudge sauce
- A cup of strong, hot espresso or coffee ☕
- Served alongside a slice of classic chocolate cake 🍰
📦 How to Store
- Ice Cream: Store in an airtight, freezer-safe container. For best results, press a piece of plastic wrap or parchment paper directly onto the surface of the ice cream before sealing with the lid. This prevents ice crystals and freezer burn. It will keep for up to 2 weeks.

Get Recipes on Pinterest
🍰 More Recipes You’ll Love
- Chocolate Lofthouse Cookies: Your New Favorite Soft & Fudgy Treat! 🍫🍪
- Cookies & Cream Cookies: Your New Favorite Oreo-Filled Treat!
- Delightful Strawberry Swirl Cookies: A Chewy, Fruity Treat! 🍓✨
- The Ultimate Soft Batch Double Chocolate Chip Cookies
Cookies & Cream Ice Cream
Description
No-churn ice cream is a magical invention for home cooks, and this Cookies and Cream version is a testament to its simple genius. While many modern no-churn recipes rely on sweetened condensed milk, this classic method uses a simple cream, milk, and sugar base. The magic happens during the freezing process, where periodic, vigorous stirring mimics the action of an ice cream maker's churn, breaking down ice crystals to create a remarkably smooth and creamy texture without any special equipment.
Ingredients


Instructions
-
Dissolve the sugar
In a medium mixing bowl, whisk together the whole milk, granulated sugar, and salt until the sugar fully dissolves. Rub a little mixture between your fingers to check. If it still feels gritty, keep whisking.
-
Add the cream and vanilla
Pour in the heavy whipping cream and vanilla extract. Stir gently until fully combined and smooth.
-
Chill the mixture
Cover the bowl and refrigerate for at least 1 hour. Cold mixture freezes faster and forms a creamier texture with fewer ice crystals.
-
Start the first freeze
Pour the chilled mixture into a freezer-safe container or loaf pan. Cover tightly and freeze for 45 minutes.
-
Break up the ice crystals
Remove the container from the freezer and whisk the mixture vigorously. You can also use a hand mixer or immersion blender. This step breaks up early ice crystals and helps create that soft creamy texture instead of frozen dairy cement.
-
Add the cookies
Fold in the chopped chocolate sandwich cookies. Use a mix of bigger chunks and fine crumbs for the best texture in every scoop.
-
Continue freezing and mixing
Return the container to the freezer. Every 30 minutes for the next 2 to 3 hours, remove it and stir vigorously again. This repeated mixing mimics the churning process of an ice cream machine.
-
Freeze until scoopable
Once the ice cream is firm and creamy, let it freeze fully for another hour if needed before serving.
-
Serve and enjoy
Scoop into bowls or cones and serve immediately. Cold creamy vanilla, crunchy cookie pieces, tiny pockets of chocolate everywhere. Freezer peace lasts about twelve minutes around this recipe.