

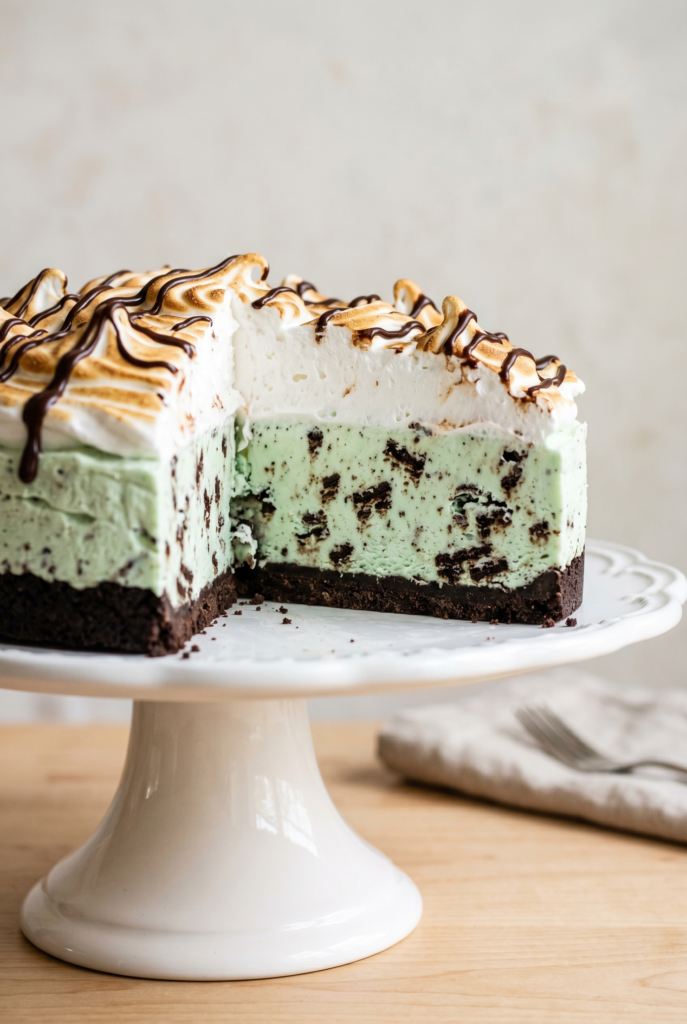
Ultimate Brownie Baked Alaska, Easy Ice Cream Meringue Dessert
You bring it to the table all golden and toasted, people immediately stop talking, and suddenly everyone becomes a food photographer for five straight minutes. Then somebody cuts into it and finds the frozen ice cream center hiding inside the warm marshmallow meringue like a tiny dessert plot twist.
And honestly, replacing the classic sponge cake with brownies was the correct life decision here. Fudgy chocolate base. Creamy ice cream dome. Toasted marshmallow cloud on top. It tastes like three desserts formed a very chaotic alliance.
❤️ Why You’ll Love This Recipe
- Total Showstopper – With its golden-brown meringue peaks and surprise ice cream center, this dessert has a massive wow factor perfect for any celebration.
- Better with Brownies – Let’s be honest, a fudgy brownie base is infinitely more delicious and easier to make than a dry sponge cake. It’s a modern upgrade to a retro classic!
- Completely Customizable – Use mint chip, coffee, strawberry, or even pistachio swirl ice cream! You get to pick your favorite flavor to hide inside.
- Make-Ahead Magic – You can assemble the entire dessert days in advance and just toast the meringue right before serving, making party prep a breeze.
🛠 Tools You’ll Need
- 9-inch (2.5 quart) mixing bowl 🥣
- Electric Stand Mixer or Hand Mixer ⚡
- 9-inch round cake pan 🎂
- Saucepan and heatproof bowl (or a double boiler)
- Kitchen Torch (or use your oven’s broiler) 🔥
- Plastic Wrap
🥄 Key Ingredients
For the Ice Cream Dome:
- Your Favorite Ice Cream (3 quarts) – This is the creamy, dreamy heart of your Baked Alaska. Choose a flavor that pairs well with chocolate, like mint chip, coffee, or classic vanilla. 🍦
For the Brownie Base:
- Brownie Batter (for a 9-inch pan) – A dense, fudgy brownie provides the perfect rich, chocolatey foundation that holds up to the ice cream and meringue. We recommend our go-to chewy brownie recipe! 🍫
For the Marshmallow Meringue:
- Egg Whites (4 large) – The key to a light, airy, and voluminous meringue. Make sure they’re at room temperature and free from any yolk! 🥚
- Granulated Sugar (1 cup) – Dissolves into the egg whites to create a sweet, stable, and glossy meringue.
- Cream of Tartar (1/2 tsp) – A magic ingredient that stabilizes the egg whites, helping them whip up to stiff, beautiful peaks that hold their shape. ✨
- Vanilla Extract (1/2 tsp) – Adds a lovely warmth and classic marshmallow flavor.
🍳 How to Make Brownie Baked Alaska
- Shape the Ice Cream Dome: Let your ice cream soften slightly. Line a 9-inch bowl with plastic wrap, leaving plenty of overhang. Beat the softened ice cream until smooth, then spread it evenly into the lined bowl. Cover and freeze solid for at least 8 hours, or preferably overnight. 🥶
- Bake the Brownie Base: Preheat your oven to 350°F (177°C). Prepare a 9-inch round cake pan by greasing it and lining it with parchment paper. Pour in your favorite brownie batter and bake until a toothpick comes out with moist crumbs. Let it cool completely. 🤎
- Assemble the Base: Once cooled, carefully invert the brownie onto the frozen ice cream dome in the bowl. Use the plastic wrap to cover it and pop it back in the freezer for at least 30 minutes to firm up.
- Whip the Meringue: In a heatproof bowl set over a saucepan of simmering water (don’t let the bowl touch the water), whisk the egg whites, sugar, and cream of tartar constantly. Continue until the sugar has completely dissolved and the mixture is warm to the touch (about 4 minutes). ♨️
- Reach for the Peaks: Transfer the mixture to your stand mixer fitted with a whisk attachment. Add the vanilla extract and beat on high speed until stiff, glossy, marshmallowy peaks form, about 5-6 minutes. You should be able to turn the bowl upside down without it sliding!
- Cover and Swirl: Remove the ice cream/brownie from the freezer and invert it onto an oven-safe serving platter or a foil-lined baking sheet. Working quickly, spread the meringue all over, making sure to completely seal in the ice cream. Use the back of a spoon to create dramatic swirls and peaks. 🎨
- Toast to Perfection: If using a kitchen torch, toast the meringue until it’s beautifully golden-brown all over. If using the oven, bake at 450°F (232°C) for 4-5 minutes. Keep a close eye on it! Serve immediately and watch the jaws drop. 😍
💡 Tips for Success
- Freeze Solid – Don’t rush the freezing time for the ice cream dome! A rock-solid dome is your best defense against melting when you toast the meringue.
- Plastic Wrap is Your Friend – The overhanging plastic wrap in the bowl is crucial for easily lifting out the perfectly shaped ice cream dome.
- Total Meringue Coverage – Ensure every last bit of ice cream is covered with a thick layer of meringue. Any exposed spots will melt instantly under the heat.
- Clean Bowl, Happy Meringue – Make sure your mixing bowl and whisk are completely free of any grease or fat, as even a tiny drop can prevent your egg whites from whipping up properly.
🆘 Troubleshooting Guide
- Problem: My meringue is runny and won’t form stiff peaks.
Likely Cause: There might have been a speck of yolk or grease in your bowl, or the sugar wasn’t fully dissolved.
Solution: Unfortunately, you’ll need to start over. Make sure your bowl and attachments are squeaky clean and that no yolk gets into your whites. - Problem: The ice cream melted everywhere when I baked it!
Likely Cause: The ice cream wasn’t frozen solid enough, or there were gaps in the meringue insulation.
Solution: Freeze the dome for longer next time (overnight is best!) and apply a thick, complete layer of meringue, sealing it all the way down to the plate. - Problem: The brownie base is too hard to slice.
Likely Cause: It’s frozen solid along with the ice cream.
Solution: Let the finished Baked Alaska sit at room temperature for 1-2 minutes before slicing. A sharp serrated knife dipped in hot water also works wonders.
👩🍳 Pro Chef Tips
- Go for Cupcakes: For an easier, single-serving version, bake brownie batter in a cupcake tin. Top each cooled brownie cupcake with a scoop of ice cream, cover with meringue, and toast! It’s much faster and requires no special bowl.
- Flavor Surprise: When making the cupcake version, use a different flavor of ice cream for each one! Your guests will love the surprise inside.
- The Right Knife: For clean, beautiful slices of the large Baked Alaska, use a long, sharp serrated knife. Run it under hot water and wipe it clean between each cut.
☕ Perfect Pairings
- A shot of hot espresso to cut through the sweetness ☕
- A generous drizzle of warm chocolate or caramel sauce 🍫
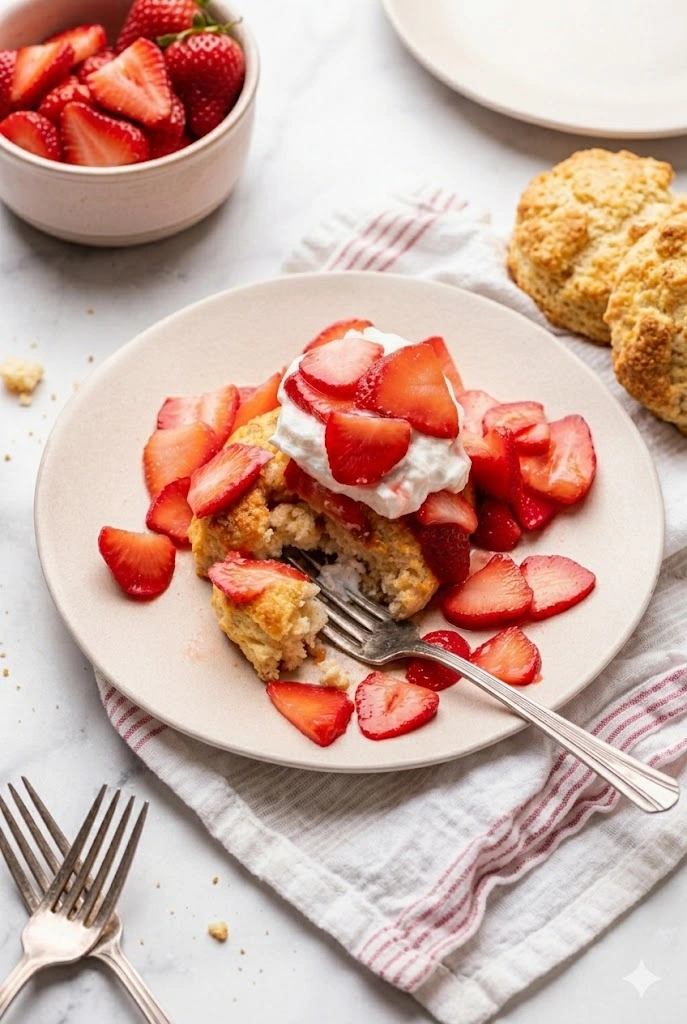
- A simple bowl of fresh berries, like raspberries or strawberries 🍓
📦 How to Store
- Un-Toasted: You can assemble the entire dessert, cover it with meringue, and freeze it for up to 2 days. Just wrap it well in plastic wrap and toast it right before serving.
- Leftovers: Place any leftover slices back in the freezer immediately in an airtight container. It’s best enjoyed within 3-4 days, though the meringue texture may change slightly.

Get Recipes on Pinterest
🍰 More Recipes You’ll Love
- 🎃 Pumpkin Pudding Cookies Soft, Spiced & Ready in 30 Minutes!
- Valentine’s Day Brownies ❤️🍫 Ultra Fudgy Chocolate Brownies with M&M’s
- 🍪 Ultra-Soft Cinnamon Cream Cheese Cookies
- 🎀 Soft Sour Cream Cookies with Pink Frosting
Ultimate Brownie Baked Alaska 🔥🏔️
Description
The Brownie Baked Alaska is a triumphant return of a classic dessert, reimagined for the modern baker. Originating in the 19th century, the traditional Baked Alaska features a sponge cake base, but we've elevated it with a foundation of rich, fudgy, and intensely chocolatey brownie. This simple swap adds a decadent texture and flavor that perfectly complements the cool, creamy ice cream center and the billowy, sweet marshmallow meringue shell.
Ingredients
For the Ice Cream & Brownie:

For the Marshmallow Meringue:
Instructions
-
Prepare the ice cream dome
Line a 9-inch mixing bowl with plastic wrap, leaving plenty hanging over the sides. Let the ice cream soften slightly for about 10 minutes until spreadable but not melted. Spoon the ice cream into the bowl and smooth it into an even dome shape. Cover tightly with the plastic wrap and freeze for at least 8 hours, preferably overnight, until completely solid.
-
Bake the brownie base
Preheat the oven to 350°F (177°C). Grease and line a 9-inch round cake pan with parchment paper. Pour the brownie batter into the pan and bake until a toothpick inserted in the center comes out with a few moist crumbs attached. Let the brownie cool completely before assembling.
-
Attach the brownie layer
Place the cooled brownie directly over the frozen ice cream dome inside the bowl. Press gently so it sits flat against the ice cream. Fold the plastic wrap back over everything and freeze again for at least 30 minutes to firm up.
-
Make the marshmallow meringue
Fill a saucepan with a few inches of simmering water. In a heatproof bowl set over the saucepan, whisk together the egg whites, sugar, and cream of tartar continuously for about 4 minutes until the sugar fully dissolves and the mixture feels warm.
-
Whip the meringue
Transfer the warm egg white mixture to a stand mixer or use a hand mixer. Add the vanilla extract and beat on high speed for 5 to 6 minutes until stiff, glossy peaks form. The meringue should look thick, shiny, and dramatically fluffy. Dessert hair commercial levels of volume.
-
Assemble the Baked Alaska
Remove the frozen dome from the freezer and invert it onto an oven-safe serving platter or baking sheet. Peel away the plastic wrap. Quickly spread the meringue all over the dessert, making sure every bit of ice cream is completely covered. Use the back of a spoon to create swirls and peaks for that classic toasted look.
-
Toast the meringue
Use a kitchen torch to toast the meringue until golden brown all over. If using the oven, bake at 450°F (232°C) for 4 to 5 minutes until beautifully toasted. Watch it closely because meringue goes from golden to “well that escalated quickly” in seconds.
-
Slice and serve
Let the dessert sit at room temperature for 1 to 2 minutes before slicing. Dip a sharp serrated knife into hot water and wipe clean between cuts for neat slices with distinct layers. Then stand back and enjoy the very deserved compliments.