

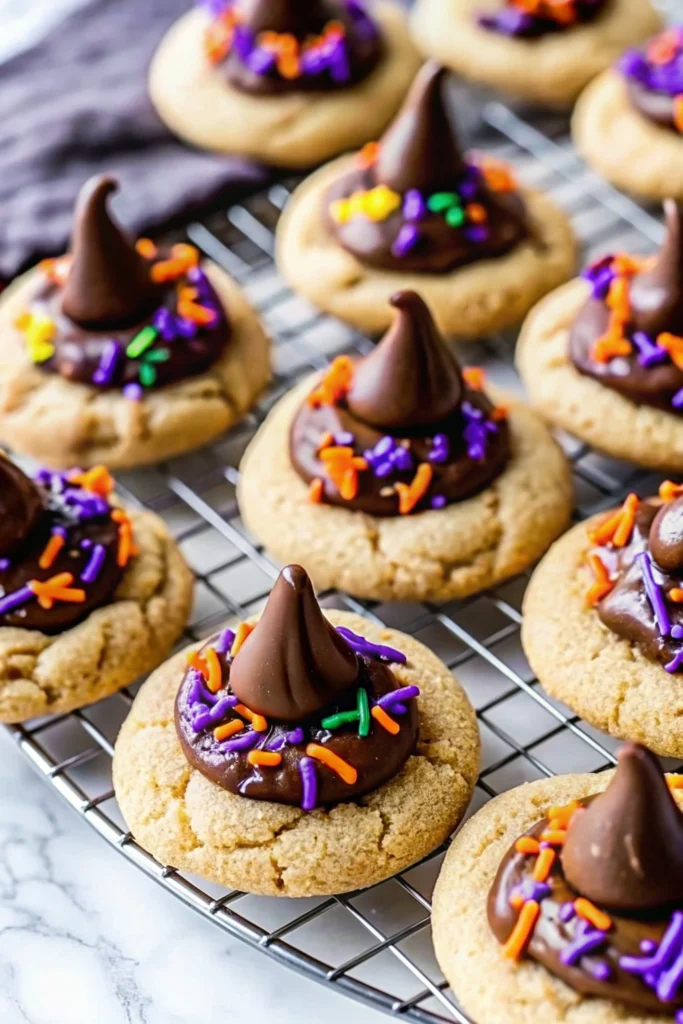
Bring a little enchantment to your Halloween with these adorable Witch Hat Cookies! Soft, buttery peanut butter cookies become magical with chocolate wafer brims, chocolate kiss hat points, and bright, colorful buttercream.
Perfect for parties or baking alongside little helpers, each cookie is a whimsical treat that delights both the eyes and the taste buds. These spookily cute cookies are more than just dessert they’re a festive memory in every bite.
❤️ Why You’ll Love This Recipe
- Magical & Fun – Adorable witch hat design perfect for Halloween.
- Peanut Butter & Chocolate – Classic, crowd-pleasing flavor combination.
- Easy Assembly – Simple to put together with store-bought chocolate wafers and kisses.
- Kid-Friendly – A fun project to make and decorate with children.
🛠 Tools You’ll Need
- Stand mixer with paddle attachment or hand mixer
- Medium bowl (for dry ingredients)
- Baking sheets
- Parchment paper
- Wire rack
- Piping bag (round tip or cut tip)
🥄 Key Ingredients
For the Cookies:
- All-purpose flour – Spooned and leveled.
- Baking soda & Salt – For leavening and flavor balance.
- Granulated sugar – Plus extra for rolling.
- Light brown sugar – Packed, for moisture and flavor depth.
- No-stir creamy peanut butter – The cookie base 🥜
- Unsalted butter – Room temperature 🧈
- Large egg – Room temperature
- Pure vanilla extract – Flavor enhancer
For the Decorations:
- Chocolate melting wafers – Hat brims
- Unsalted butter – Room temperature, for frosting glue
- Confectioners’ sugar – Sifted for smooth frosting
- Vanilla extract & Pinch of salt – Frosting flavor
- Heavy cream or whole milk – Adjust frosting consistency
- Gel food coloring – Orange, purple, or green
- Chocolate kisses – Hat points 🍬
- Sprinkles – Extra sparkle ✨
🍪 How to Make Witch Hat Cookies
1. Preheat Oven & Dry Ingredients:
Preheat oven to 375ºF (190°C). Line baking sheets with parchment paper. Whisk flour, baking soda, and salt in a medium bowl.
2. Make Cookie Dough:
In a stand mixer, beat granulated sugar, brown sugar, butter, and peanut butter until light and fluffy (~2 minutes). Add egg and vanilla, beating until combined. Slowly add flour mixture on low speed until just incorporated. Do not overmix.
3. Roll and Bake:
Scoop tablespoon-sized dough balls, roll in extra sugar, and place 2 inches apart on baking sheet. Flatten slightly. Bake for 10 minutes, until edges are light golden.
4. Assemble the Brim:
Press a chocolate wafer on each cookie immediately after baking. Spread melted chocolate slightly with a spoon. Transfer to a wire rack to cool.
5. Make Frosting:
Beat butter until creamy. Gradually add confectioners’ sugar, vanilla, heavy cream, and salt. Mix until smooth and pipeable. Tint frosting with gel colors.
6. Decorate:
Pipe a small frosting dollop onto the bottom of an unwrapped chocolate kiss and press onto the wafer. Pipe a ring of frosting around the base of the kiss and add sprinkles. Serve!
💡 Tips for Success
- Don’t Overmix: Prevents tough cookies. Mix only until flour is incorporated.
- Use Gel Food Coloring: Keeps frosting texture intact.
- Room Temperature Ingredients: Ensures smooth dough and frosting.
- Unwrap Kisses Early: Saves time during assembly.
🆘 Cookie Troubleshooting Guide
Problem: Cookies flat or spread too much.
Cause: Butter too soft or dough overmixed.
Solution: Use butter soft enough to leave a thumbprint; mix flour on low speed just until combined.
Problem: Chocolate wafer doesn’t spread nicely.
Cause: Cookie cooled too much.
Solution: Press wafer immediately after baking while hot.
Problem: Frosting too runny or stiff.
Cause: Wrong cream amount.
Solution: Adjust heavy cream 1 tbsp at a time; add more powdered sugar if needed.
👩🍳 Pro Chef Tips
- Make Ahead: Dough can be stored up to 3 days; baked cookies up to a week.
- Alternative Colors: Use any festive gel colors—black, bright pink, etc.
- Use a Star Tip: For a more elaborate frosting border.
☕ Perfect Pairings
- Cold Milk: Classic pairing with peanut butter cookies.
- Hot Apple Cider: Complements fall flavors.
- Black Coffee: Cuts through sweetness.
- Peanut Butter Hot Chocolate: Decadent treat for peanut butter lovers.
📦 How to Store
- Room Temperature: Airtight container, 5–7 days.
- Freezer: Undecorated cookies, up to 3 months. Thaw before decorating.
🎃 More Spooky Halloween Recipes to Try 👻
- 🕷️ Spooky Red Velvet Spider Cookies Soft, Chewy & Perfect for Halloween Nights 🎃
- 🎃Easy Halloween Peanut Butter Spider Cookies 🕷️🥜
- 🎃Easy & Spooky Halloween Mummy Cookies 🍫👻
- 🎃 The Best Halloween Chocolate Chip Cookies 👻🍪

Get Recipes on Pinterest
🎃 Irresistible Halloween Witch Hat Cookies Peanut Butter & Chocolate Magic 🧙♀️🍪
Description
These Magical Witch Hat Cookies are a fun and spooky Halloween treat! Soft peanut butter cookies with chocolate wafer brims, chocolate kiss hat points, and colorful buttercream make them perfect for parties or baking with kids.
Ingredients


Instructions
-
Preheat oven to 375º F. Line baking sheet with parchment paper and set aside.
-
In a medium bowl, whisk together flour, baking soda, and salt. Set aside.
-
In the bowl of a stand mixer, combine granulated sugar, brown sugar, butter, and peanut butter. Beat until fluffy, about 2 minutes.
-
Add egg and vanilla. Beat until mixed, about 30 seconds.
-
With the mixer on low, slowly add the flour mixture and beat just until combined.
-
Scoop a full tablespoon of dough and roll into 1-inch balls. Roll in extra sugar and place on baking sheet. Press down slightly.
-
Bake for 10 minutes, or until light golden brown.
-
Remove from oven and immediately press a chocolate wafer on top. Spread slightly with the back of a spoon.
-
Transfer cookies to a wire rack to cool.
-
Make the frosting by beating butter until creamy. Gradually add confectioners’ sugar.
-
Add vanilla, heavy cream, and salt. Mix until combined.
-
Divide frosting into bowls and add food coloring. Stir until desired color is reached.
-
Transfer frosting to piping bags with round tips.
-
Frost the bottom of a chocolate kiss and press it onto the hardened chocolate wafer.
-
Add sprinkles if desired and serve.
Note
- Use room temperature ingredients for best results.
- Adjust frosting consistency with more cream or sugar as needed.
- Store cookies in an airtight container for up to 3 days.