Print Options:

Create Sweet Memories with this Irresistible Tiramisu

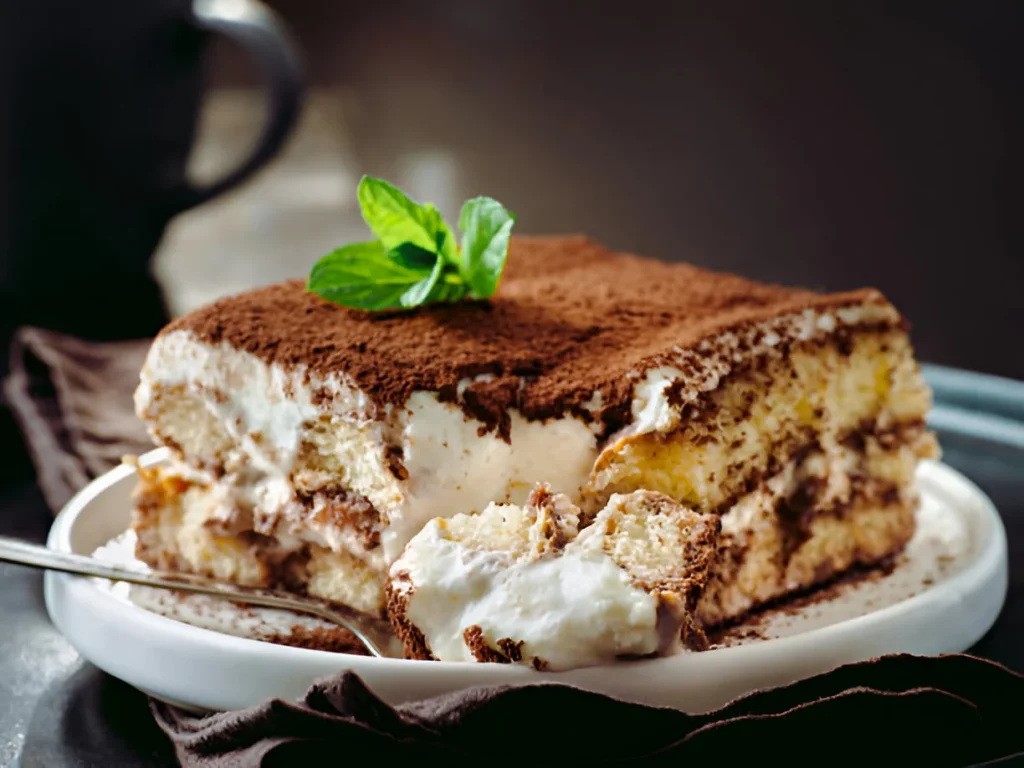
easy tiramisu
Tiramisu is more than just a dessert; it’s a love letter from Italy that speaks to the heart of anyone with a sweet tooth. Growing up, I remember the joy of gathering around the table with family, the rich aroma of espresso filling the air as we indulged in this decadent treat. Each layer of tiramisu told a story of warmth, laughter, and cherished memories, and it always brought us closer together. When I set out to recreate this beloved classic, I wanted to craft a version that everyone could enjoy, especially those who might hesitate at the thought of raw eggs. My recipe breaks away from tradition, ensuring that it’s not only delicious but also safe and simple to make. By swapping out the eggs for light, airy whipped cream, I’ve created a tiramisu that retains the rich flavors we all adore without the fuss of complicated techniques or concerns about raw ingredients. This dessert is my heartfelt way of sharing a piece of nostalgia, inviting you to create your own moments of joy and connection. With each bite, I hope you experience the same warmth and delight that this treat has brought into my life. Let’s dive into making this irresistible, egg-free, coffee-kissed dessert together—because every gathering deserves a little bit of love, and this modern tiramisu is the perfect way to express it!

What you’ll love about this tiramisu dessert

  • Simple yet Elegant: This recipe is easy to prepare but gives an impression of a sophisticated, restaurant-quality dessert.
  • No Baking Required: With no baking involved, it’s a quick dessert that simply requires some refrigeration to set.
  • Customizable: You can adjust the flavor by adding coffee liqueur, using decaf coffee, or even adding a hint of chocolate in the layers.
  • Light and Creamy Texture: The mascarpone and whipped cream mixture make this tiramisu irresistibly light, creamy, and smooth.
  • Perfect Make-Ahead Dessert: It actually tastes better when prepared in advance, allowing the flavors to meld together for the ultimate indulgence.

Keys Ingredients

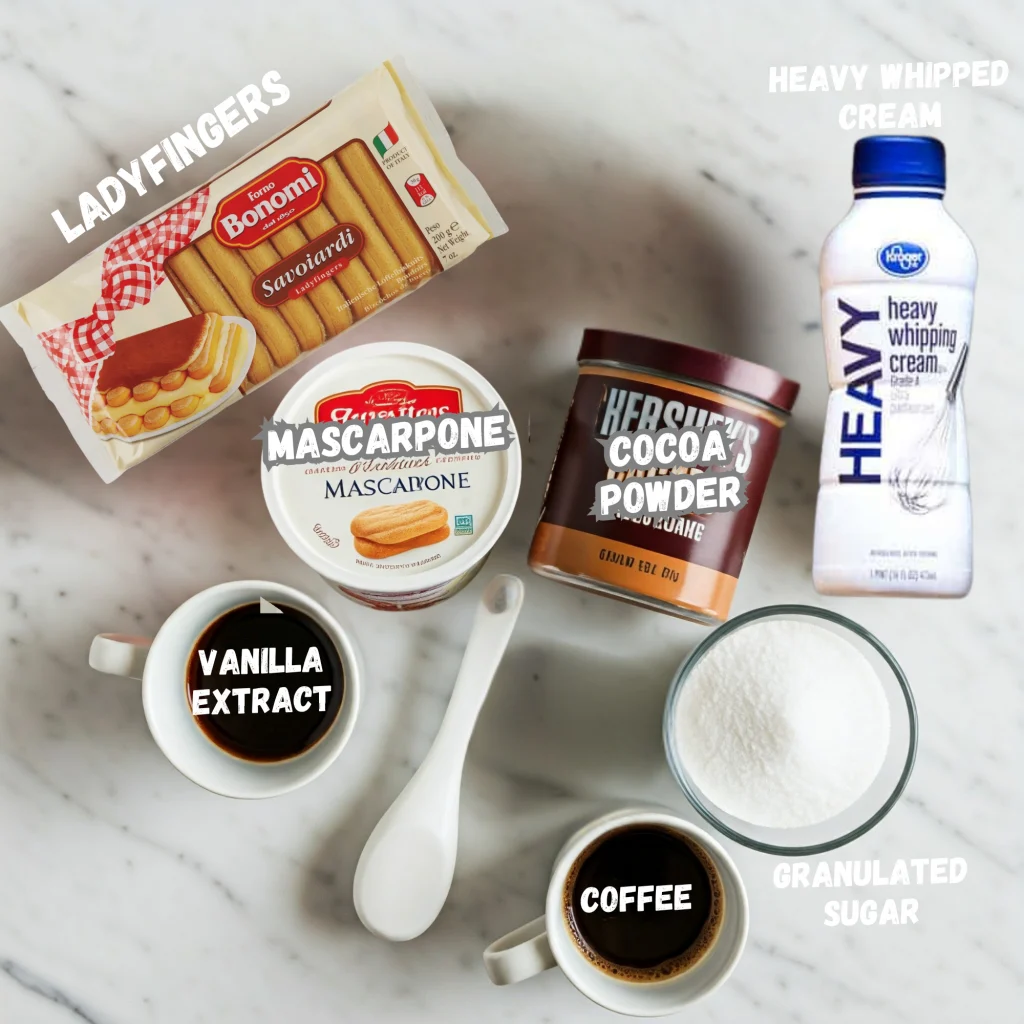
  • Heavy whipping cream: Provides the light, fluffy texture of the cream layer.
  • Mascarpone cheese: This Italian cheese is the heart of the tiramisu, offering a rich, velvety texture.
  • Granulated sugar: Sweetens the mascarpone and whipped cream mixture.
  • Vanilla extract: Adds a subtle depth of flavor.
  • Cold espresso: The bold coffee flavor that soaks into the ladyfingers.
  • Coffee-flavored liqueur (optional): Adds a deeper coffee flavor with a touch of sweetness.
  • Lady Fingers (Savoiardi): The traditional cookies that form the base and middle layers of tiramisu, absorbing the coffee for a soft yet firm texture.
  • Cocoa powder: For the finishing touch, dusted on top for a slight bitterness and visual appeal.
The ingredients needed for tiramisu including ladyfingers, espresso, mascarpone, cocoa powder, cream, vanilla and sugar.

How to Make Tiramisu:

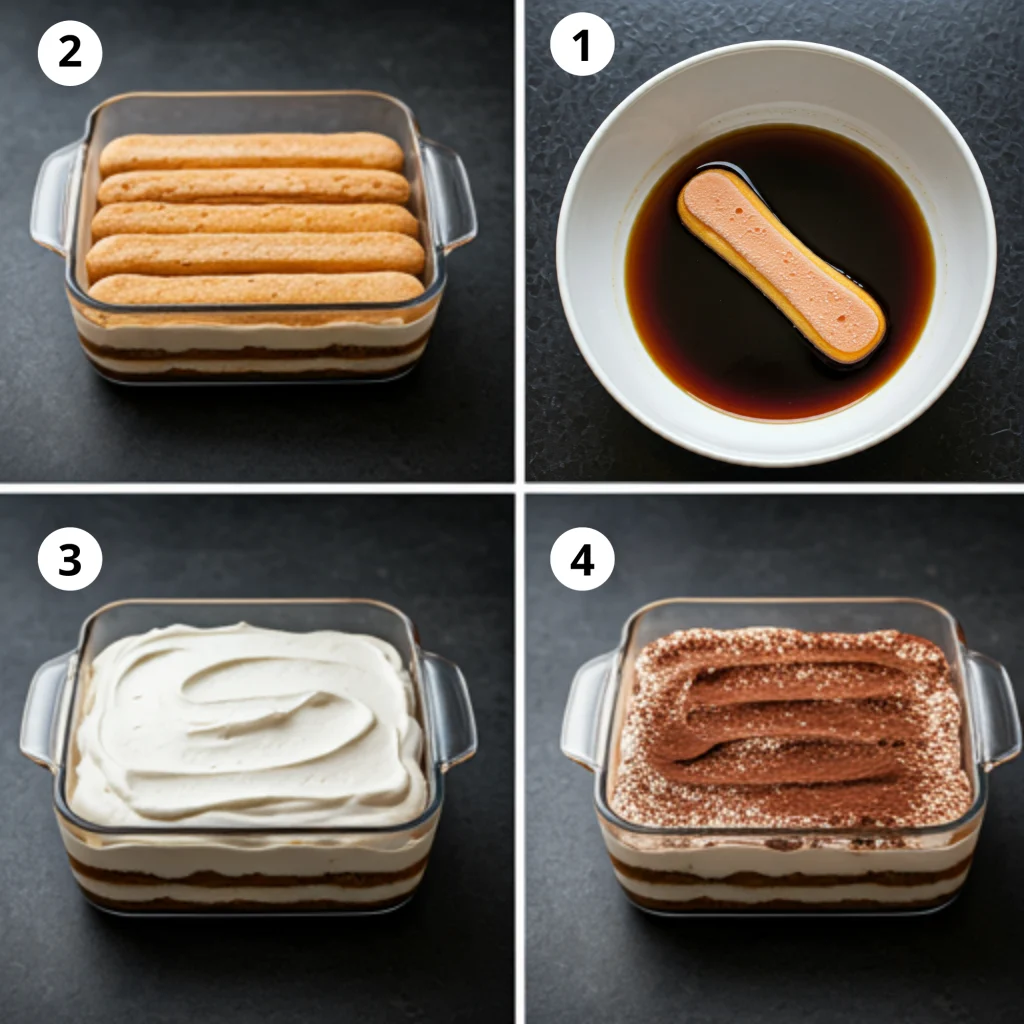
  1. Prepare the Cream: Whip heavy cream until stiff peaks form, then add sugar, vanilla, and fold in mascarpone.
  2. Prepare the Coffee Mixture: Combine cold espresso and optional coffee liqueur.
  3. Dip the Ladyfingers: Quickly dip ladyfingers in the coffee and arrange them in a single layer in an 8x8 dish.
  4. Layer: Spread half the mascarpone cream over the ladyfingers, add another layer of dipped ladyfingers, and top with the remaining cream.
  5. Chill: Dust with cocoa powder and refrigerate for 3-4 hours or overnigh
Process photos for layering tiramisu including dipping ladyfingers in espresso, layering a dish, adding mascarpone cream, layering again and topping with cocoa powder.

Freezing Instructions: Tiramisu also freezes well if you'd like to store it for longer. Here’s how:

  • After assembling the tiramisu, instead of refrigerating it, cover it tightly with plastic wrap and a layer of aluminum foil.
  • Freeze for up to 2 months.
  • To serve, transfer the tiramisu from the freezer to the refrigerator and allow it to thaw overnight. Dust it with fresh cocoa powder just before serving for a perfect finish.
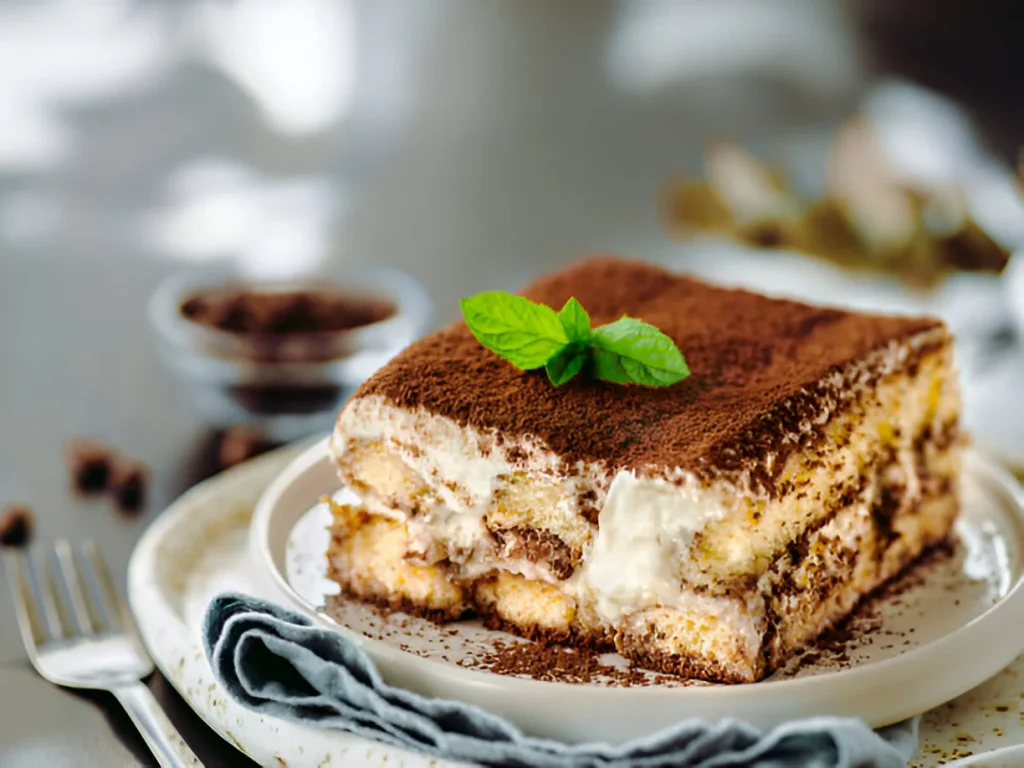
very easy tiramisu

Best Tiramisu Recipe Tips and Variations

  • Don’t Over-Soak the Ladyfingers: Quickly dip the ladyfingers in the espresso to prevent them from becoming soggy.
  • Use Fresh, Quality Ingredients: Fresh espresso and high-quality mascarpone make a big difference in flavor.
  • Chill for Optimal Flavor: Refrigerate for at least 4 hours, but overnight is best to let the flavors meld together perfectly.
  • Add Chocolate: For a twist, shave some dark chocolate between the layers or sprinkle it on top along with the cocoa powder.
  • Kid-Friendly Option: Skip the coffee liqueur and use decaffeinated coffee for a family-friendly dessert.
  • Fruit-Infused Tiramisu: Add fresh berries or fruit puree between the layers for a summery variation.
Cuisine
Time
Prep Time: 15 mins Total Time: 15 mins
Servings 9
Estimated Cost $  1
Calories 300
Description
Tiramisu is more than just a dessert; it’s a love letter from Italy that speaks to the heart of anyone with a sweet tooth. Growing up, I remember the joy of gathering around the table with family, the rich aroma of espresso filling the air as we indulged in this decadent treat. Each layer of tiramisu told a story of warmth, laughter, and cherished memories, and it always brought us closer together.
Ingredients
  • 1 ½ cups heavy whipping cream ((360 ml))
  • 8 ounces mascarpone cheese ((225 g))
  • cup granulated sugar ((65 g))
  • 1 teasp vanilla extract
  • 1 ½ cups cold espresso ((360 ml))
  • 3 tbsp coffee-flavored liqueur
  • 1 package ladyfinger
  • Cocoa powder
Instructions
    Prepare the Mascarpone Cream
  1. Whip the Cream: In a large mixing bowl, pour in the heavy whipping cream. Using an electric hand mixer, start beating on medium speed. Continue to whip until the cream thickens and stiff peaks form. This should take a few minutes.

  2. Add Sugar and Vanilla: Once the cream reaches the desired consistency, slowly add the granulated sugar and vanilla extract while continuing to beat. This will add a balanced sweetness to the cream.

  3. Incorporate the Mascarpone: After the sugar is well incorporated, add the room-temperature mascarpone cheese. Using a silicone spatula or a wooden spoon, gently fold the mascarpone into the whipped cream. Be careful not to overmix, as you want to maintain the lightness of the cream. Mix until the mixture is smooth and well combined. Set aside.

  4. Prepare the Coffee
  5. In a shallow bowl, pour in the cold espresso. If you choose to use the coffee liqueur, add it at this point. Stir gently to combine. The espresso should be cold to prevent the ladyfingers from becoming too soggy.

  6. Dip the Ladyfingers
  7. Take a ladyfinger and quickly dip it into the coffee mixture. Make sure not to soak it for too long, as it can become too soft; a quick dip of one to two seconds on each side is sufficient to moisten the biscuit.

  8. Place the dipped ladyfingers in a single layer at the bottom of the 8x8-inch dish, ensuring they are slightly touching for an even coverage.

  9. Assemble the Tiramisu
  10. Carefully spread half of the mascarpone mixture over the soaked ladyfingers. Use a spatula to smooth the cream over the surface, ensuring an even layer that covers the biscuits.

  11. Repeat the process with another layer of dipped ladyfingers, placing them in the same manner as before.

  12. Finally, spread the remaining mascarpone mixture over the second layer of ladyfingers, smoothing the top for a neat finish.

  13. Finish the Dessert
  14. Before serving, it’s time to add the finishing touch: the cocoa powder. Use a fine mesh strainer to generously dust cocoa powder over the top of the tiramisu. This not only adds flavor but also enhances the presentation. You can sift the cocoa powder to avoid any clumps.

  15. Refrigerate
  16. Carefully cover the dish with plastic wrap or an airtight lid. This will prevent the tiramisu from absorbing other odors in the refrigerator.

  17. Place the tiramisu in the refrigerator for at least 3 to 4 hours, but ideally overnight. This allows the flavors to meld and the cream to set to the perfect consistency.

  18. Serve
  19. When you're ready to serve, remove the tiramisu from the refrigerator. Use a knife to cut it into portions.

  20. Serve in individual plates, and if desired, add a sprinkle of additional cocoa powder or chocolate shavings as a garnish.

Nutrition Facts

Servings 9


Amount Per Serving
Calories 300kcal

Jessica Carter
Food and Lifestyle Blogger

Hello! I’m Jessica Carter, the passionate baker behind Sweet Creations. My love for pâtisserie began in my grandmother’s kitchen, where I learned that baking is about more than just recipes—it’s about love, patience, and sharing. This blog is my way of continuing her legacy, sharing what I’ve learned, and bringing a little sweetness into your life. Let’s bake something special together!