How to Make Quick Microwave Red Velvet Cake
- Prepare the dish and ingredients: Grease a 7-inch microwave-safe dish and set aside. In a small bowl, mix the milk and lemon juice to create homemade buttermilk. Let it sit for about 5 minutes.
In a separate bowl, sift together the flour (Maida), baking soda, and cocoa powder. Set aside.
- Prepare the wet ingredients: Using a handheld mixer, beat the vegetable oil and powdered sugar on medium speed for about 1 minute until smooth and combined. Add the yogurt and vanilla extract, and continue beating for 1-2 minutes. Add a few drops of red food coloring to achieve your desired shade. Beat until everything is well incorporated.
- Incorporate dry ingredients and buttermilk: Turn the mixer to low speed. Add the dry flour mixture in two parts, alternating with the buttermilk. Start and end with flour. Mix until the batter is smooth and even.
- Bake the cake: Pour the batter into the prepared microwave-safe dish. Microwave on normal settings for 5-6 minutes. Check for doneness by inserting a toothpick—it should come out clean. If needed, microwave in additional 30-second intervals until fully cooked.
- Cool and decorate: Allow the cake to cool completely in the dish. In the meantime, prepare a cream cheese frosting or your favorite icing.
Once cooled, generously frost the cake. Chill in the fridge for 30-60 minutes to set before slicing. Enjoy!

Easy Red Velvet Cake : A Sweet Dessert Delight
Description
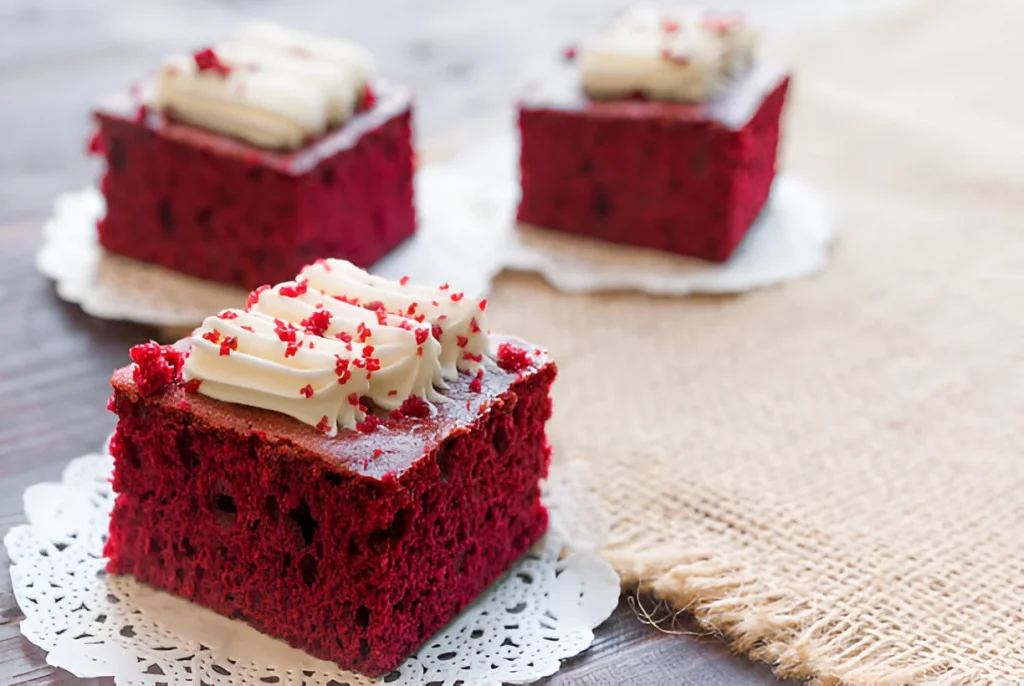
Red Velvet cake is so much more than just a vanilla cake dyed red. This quick and easy microwave version captures the essence of true Red Velvet, with its delicate flavors of cocoa, vanilla, and a slight tang from homemade buttermilk. While this recipe doesn’t rely on whipped egg whites, the combination of yogurt and oil ensures a moist, velvety crumb—perfect for a fast bake.This is my speedy take on Red Velvet cake, ideal for those looking to indulge in no time. No need for an oven, no lengthy prep—just a microwave and a few simple ingredients. The result? A surprisingly light cake, despite its quick preparation, topped with an irresistible cream cheese frosting. This cake masterfully balances cocoa and vanilla, with that signature tangy twist that sets it apart. Simple to make yet still spectacular to enjoy, this is the microwave Red Velvet cake you’ve been waiting for
Ingredients
Dry Ingredients
Wet Ingredients
Other
Instructions
1. Prepare the Dish and Ingredients:
-
Grease a 7-inch microwave-safe dish and set it aside.
-
In a small bowl, mix the milk and lemon juice to create homemade buttermilk. Let it sit for about 5 minutes.
-
In a separate bowl, sift together the Maida, baking soda, and cocoa powder. Set aside.
2. Prepare the Wet Ingredients:
-
Using a handheld mixer, beat the vegetable oil and powdered sugar on medium speed for about 1 minute until smooth and well combined.
-
Add the yogurt and vanilla extract, and continue beating for an additional 1-2 minutes.
-
Incorporate a few drops of red food coloring to achieve your desired shade. Beat until all ingredients are well combined.
3. Incorporate Dry Ingredients and Buttermilk:
-
With the mixer on low speed, add the dry flour mixture in two additions, alternating with the homemade buttermilk. Begin and end with the flour mixture.
-
Mix until the batter is smooth and uniform.
4. Bake the Cake:
-
Pour the batter into the prepared microwave-safe dish.
-
Microwave on normal settings for 5-6 minutes. Check for doneness by inserting a toothpick; it should come out clean. If needed, continue microwaving in additional 30-second intervals until the cake is fully cooked.
5. Cool and Decorate:
-
Allow the cake to cool completely in the dish.
-
While the cake is cooling, prepare your favorite cream cheese frosting or icing.
-
Once cooled, generously frost the cake.
-
Chill in the fridge for 30-60 minutes to set before slicing.


